Why I Chose the Singer C7290Q (and Pre-Arrival Jitters)
I remember the morning the delivery guy set a long box by my door and said, “Enjoy the new hobby!” I laughed, because it wasn’t new at all — I’d worn out a hand-me-down machine from the 90s and spent a whole month reading every Singer C7290Q review I could find. I even fell asleep a few nights with YouTube videos whispering about presser feet. By the time the Singer C7290Q arrived, I was equal parts ready and terrified I’d bought “too much machine.”
Unboxing the Singer Sewing & Quilting Machine: First Impressions
Unboxing felt like opening a toolbox for future me. A sturdy hard cover, a roomy extension table for quilting, and a tidy little tray of feet that looked like shiny candy. The machine itself had that calm confidence — solid, not flimsy. I set it on my desk, took a breath, and did the one thing all the Singer C7290Q reviews told me to do: actually read the quick-start guide.
Setup & Threading: The First “Oh-Wow” Moment
Threading turned out to be the first “oh wow” moment. The path is numbered and etched right on the body, so my hands just… followed the arrows. Drop-in bobbin? Click. Clear cover so I can see how much thread is left? Bless. The needle threader took me two tries and one mini pep talk, then — boop — thread through the eye without any squinting. I didn’t realize how much time I’d wasted poking at needles until I stopped doing it.
First Stitches: Start/Stop, Speed Slider, and Clean Cuts
I eased in with a simple tote. I pressed the start/stop button instead of the pedal (just to try it), nudged the speed slider to turtle pace, and guided the fabric. The motor didn’t rattle; it purred. The LED lights lit the whole throat plate like a tiny stage, and the first seam looked so tidy I caught myself grinning. At the end, I tapped the little scissor icon. Snip. Both threads cut short and neat. Ten minutes later I was zipping along at “confident rabbit” speed, wondering why I’d hesitated.
Decorative Playtime: Vines, Scallops, and Script
Day two was for play. The screen suggested which foot to use for each stitch — no guessing, no rummaging — and I tried decorative vines on a table runner, a gentle scallop for pillowcases, and a tiny script to label a quilt block with my initials and the year. The mirror and length/width tweaks were oddly addictive: flip the pattern, stretch it a bit, shrink it back to crisp. One tap on “default,” and the machine politely returned everything to baseline when I got too adventurous.
Heavy-Fabric Trial: The Denim Hem Test
The real test came on denim. My partner tossed a pair of jeans on my desk with that look: “hem, please?” I switched to a sturdier needle, popped on the walking foot, and slid the speed down a notch. Four thick layers at the side seam, and the Singer C7290Q just climbed the little mountain and came down the other side like it had done it a thousand times. No angry clunks. No snapped needles. Just steady stitches and a happy, short “snip” at the end. If you’ve ever fought a hem, you know that feeling of relief.
Quilting Mode: Extension Table & Free-Motion Confidence
A week later I cleared the table and clipped on the extension surface for a lap quilt. Piecing went fast thanks to needle-down (what a gift — your fabric doesn’t skate away at corners), and the start/stop button made chain-piecing feel almost meditative. When it was time to quilt, I dropped the feed dogs and practiced lazy loops on scraps until my shoulders stopped tensing. The machine stayed smooth and quiet, and that big table kept the weight of the quilt from tugging at my seams. I finished the binding in one afternoon, and it looked better than anything I’d made on my old machine.
Small Hiccups, Easy Fixes
It wasn’t all perfection, of course. On a very delicate knit, the auto thread cutter left a tiny bird’s nest underneath once or twice. My fix: give the top thread a small tug after cutting or snip knits by hand — problem solved. And the needle threader? The trick was making sure the needle’s at its highest point. Once that clicked, it threads like a champ every time.
Four Months Later: Everyday Life With the C7290Q
Four months in, this Singer sewing & quilting machine has settled into my life the way good tools do — you stop noticing the tool and start noticing your results. I’ve hemmed curtains, top-stitched a twill jacket, free-motioned a baby quilt with little hearts, and even taught my niece to sew a zip pouch. (Pro tip: speed slider all the way down + start/stop button = no “whoops, too fast!” moments.) Routine TLC — dust out the bobbin area, fresh needle, a wipe-down — keeps everything running sweet and steady.
What I Love Most About the Singer C7290Q
- Beginner-friendly controls: The start/stop button and speed control make it equally friendly for a brand-new sewist and a late-night “just one more seam” veteran.
- Time-saving thread cutter: It trims close, saves thread, and keeps my projects from growing a fringe.
- Practical stitch library: I’ve used stretch stitches on knits, a faux overlock to tame raw edges, and clean, one-step buttonholes that make my old jackets look store-bought again.
- Quilting-ready workspace: The extension table and drop-feed combo turn my desk into a quilting island whenever I need it.
Final Verdict: A Human, Hands-On Singer C7290Q Review
If you landed here searching for a human, real-world Singer C7290Q review rather than a spec sheet, this is mine: it’s the rare machine that made me braver. I buy fabric with less hesitation because I trust the stitches. I try new techniques because the screen gently tells me which foot to use and lets me undo my curiosity with a single reset. And when friends ask what machine I’d recommend, I point them to the pages of Singer C7290Q reviews I once combed through and say, “This is the one that took me from ‘I hope this works’ to ‘I can make that.’”
Would I Buy It Again?
Yes. The Singer C7290Q has that sweet balance of calm power and everyday kindness — quiet motor, bright lights, smart helpers — that turns sewing time into something I look forward to. If you’re on the fence, consider this your nudge. Open the box, thread the path, tap the scissors, and watch your ideas turn into clean, confident seams.
Pros / Cons table for the Singer C7290Q experience
| Pros (from customer feedback) | Cons (from customer feedback) |
|---|---|
| Quiet, smooth motor; solid build that stays put while sewing. | Automatic thread cutter is a common weak point (can jam, leave short tails, or fail over time). |
| Clean, consistent stitch quality on straight and decorative stitches. | Needle threader can be finicky or break; works best with the needle at its highest point. |
| Large stitch library with useful options (stretch, faux overlock) plus mirror/elongation adjustments. | Occasional tension/timing issues and skipped stitches — often fixed with proper threading, quality thread/needles, and cleaning. |
| One-step buttonholes praised on light/medium fabrics. | Customer service/repair network can be inconvenient; shipping for warranty repairs may fall on the owner. |
| Start/Stop button, speed slider, needle up/down, lock-stitch — great for beginners and precision work. | Bobbin/bobbin-winding quirks: Class 15 vs 15J confusion, tight winds, or bobbin-area jams for some users. |
| Easy threading path; drop-in bobbin with clear cover. | Free arm space feels tight; some find the extension table small. |
| Generous accessory bundle (lots of presser feet, often a walking foot) and an extension table—strong value. | No (or limited) presser-foot pressure adjustment reported on comparable models, so some fabrics feed unevenly without a walking foot. |
| Handles multiple layers (denim/canvas/vinyl) when paired with correct needle and walking foot. | Max speed feels slow to power users; a few pedal failures or inconsistent response reported. |
| Bright LED lighting and clear stitch screen that suggests the correct foot. | Built-in alphabets are basic/small—fine for labels, not premium monogramming. |
| Drop-feed dogs and quilting aids make free-motion practice approachable. | A few DOA/packaging issues and minor hardware faults (power switch, buttons) reported by some buyers. |
| Strong online community and YouTube tutorials shorten the learning curve. | Is not a heavy-duty/commercial machine — very thick seams or long denim sessions can strain it. |
Singer C7290Q — Your Most-Asked Questions Answered
What is the Singer C7290Q?
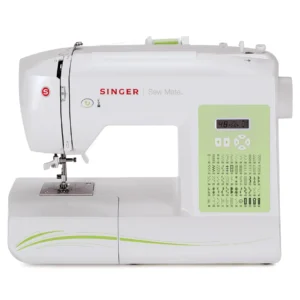
The Singer C7290Q is a computerized Singer sewing & quilting machine designed for everyday sewing, quilting, and decorative work. It offers utility, decorative, and alphabet stitch menus, a free arm for cuffs/hemming, and simple controls that make setup fast—great context if you’re scanning a Singer C7290Q review or comparing Singer C7290Q reviews.
Who is the Singer C7290Q best for?
Beginners through advanced sewists and quilters. It has clear on-screen guidance, start/stop sewing without the foot control, speed control, and up to about 800 stitches per minute for efficient piecing and quilting.
What accessories are included with the Singer C7290Q?
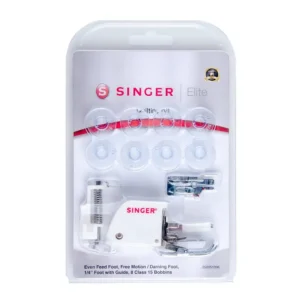
You get presser feet (All-Purpose, Satin Stitch, Blind Hem, Zipper, One-Step Buttonhole), four Class 15 transparent bobbins, needles, foot control, power cord, spool caps (small/large), felt pad, auxiliary spool pin, brush & seam ripper, L-screwdriver, and an edge/quilting guide. (Extension table is listed for other C72xx models, not C7290Q.)
How do I pick stitches on the Singer C7290Q and what are the limits?
Press the Mode button to switch menus (utility, decorative, alphabet), then use +/- to select the stitch number shown on the pull-out chart. Stitch width adjusts 0–7 mm and length 0–4.5 mm; straight stitch uses the width buttons to move needle position. Tension 3–5 is a good starting point—always test on scraps.
Does the Singer C7290Q make one-step buttonholes and how?
Yes. Slide your button into the One-Step Buttonhole Foot to auto-size, lower the buttonhole lever, align the mark, and sew—the machine completes and stops automatically. Multiple buttonhole styles are available, including rounded and keyhole options.
Does the Singer C7290Q have a built-in needle threader?
Yes. The built-in needle threader works with size 70–110 needles. It’s not for tiny size 60, wing, or twin needles—thread those manually from front to back.
Which bobbins fit the Singer C7290Q and what’s the winding/insertion process?
Use SINGER Class 15 transparent bobbins. To wind, route thread through the bobbin-winding tension disc, push the spindle right, and start; it stops automatically when full. To insert, drop the bobbin in counter-clockwise, follow the guided path, then use the bobbin thread knife to trim.
How do I adjust thread tension on the Singer C7290Q?
Turn the top tension dial. Ideal tension meets between fabric layers. Bobbin thread showing on top means top tension is too tight; loops underneath mean the top thread wasn’t seated correctly—rethread with presser foot up. For decorative stitching, expect more top thread visible underneath.
Is the Singer C7290Q good for quilting?
Yes. Use the Hand-Look Quilt stitch (bobbin thread shows on top for a hand-stitched effect), the drop-feed lever for free-motion or button sewing, the edge/quilting guide for even channels, and the speed lever to control pace. Stabilizer helps for dense stitches.
Can the Singer C7290Q handle zippers, blind hems, and edge finishing?
Yes. Zipper Foot mounts left or right for each side of the zipper. Blind Hem Foot has an adjustable guide for near-invisible hems. For finishing knit edges and seams, use multi-step zigzag, slant overedge, or closed overlock stitches as recommended.
What do Start/Stop, reverse/tie-off, needle up/down, speed slider, and thread cutter do?
Start/Stop lets you sew without the foot control; speed lever limits max speed per stitch; Reverse ties off or sews back depending on stitch; Needle Up/Down sets the stop position; the Automatic Thread Cutter ties off and trims top and bobbin threads at the end.
Does the Singer C7290Q include a free arm and accessory storage?
Yes. Slide off the accessory tray for the free arm—handy for sleeves and hemming. The tray stores feet, bobbins, and tools, and snaps back on for a larger flat surface.
What maintenance does the Singer C7290Q need?
No routine oiling. Regularly remove the needle plate to brush out lint in the feed teeth/bobbin area. For deeper cleaning, lift out the bobbin case. Don’t blow air into the machine; wipe the exterior; LED light is serviceable by qualified personnel.
What quick troubleshooting tips does the manual suggest?
Loops underneath: rethread with presser foot up. Bunching at start: hold both thread tails and start on fabric. Not feeding: check feed teeth are up/re-engage by turning handwheel once. Machine won’t sew: ensure bobbin winder is disengaged. Needle breaks or skips: replace and match needle type/size to fabric.
What safety and electrical notes should I know?
Always unplug after use and before cleaning; keep fingers clear of moving parts; wear eye protection; use only foot control C-8000; for US/Canada the polarized plug fits one way; the machine is double-insulated—use identical parts for service.
What are the main specs of the Singer C7290Q?
Max sewing speed about 800 ± 50 rpm (straight stitch default length), stitch width 0–7 mm, length 0–4.5 mm, LED lighting, presser foot rise about 6 mm, size roughly 465×210×300 mm, weight about 6.3 kg, multiple rated voltages supported.
Does the Singer C7290Q sew buttons and how?
Yes. Select the Button Sewing stitch, lower feed teeth, attach the Button Sewing Foot, align holes, test with the handwheel to ensure the needle clears, then sew; the machine stops automatically after a few swings. Re-engage feed teeth after.
Should I use stabilizer with decorative stitches or dense designs?
Yes, it’s recommended under the fabric to prevent puckering and tunneling, especially for satin and decorative stitches. Slightly reduce top tension if needed and test on scraps.
What needle sizes and types work best and how often should I change them?
Use system 130/705H needles matched to fabric: universal for wovens, stretch for knits, denim for heavy fabrics, embroidery for specialty threads. Follow the included needle/fabric chart and change needles about every 6–8 hours of sewing. Insert flat side to the back and push fully up before tightening.
What’s the simplest way to start sewing a neat first seam on the Singer C7290Q?
Thread with presser foot up, place fabric to a seam guide, lower the needle and foot, hold thread tails for the first stitches, secure with reverse at each end, then use the side thread knife so your needle doesn’t unthread before the next seam. If you’re writing your own Singer C7290Q review, these basics make setup feel easy.
| Specification | Details |
|---|---|
| Model | SINGER C7290Q Computerized Sewing & Quilting Machine |
| Machine Type | Household computerized sewing machine; double-insulated (Protection Class II in Europe). |
| Max Sewing Speed | 800 ± 50 stitches/min (straight stitch, default length). |
| Stitch Width | 0–7.0 mm (adjustable). |
| Stitch Length | 0–4.5 mm (adjustable). |
| Presser Foot Lift | 6 mm; extra-lift via presser foot lifter for thick layers. |
| Lighting | Built-in LED sewing light. |
| Display & Menus | LCD shows stitch number/width/length & foot suggestion; three stitch menus: Utility, Decorative, Alphanumeric. |
| Controls & Convenience | Start/Stop button, speed control lever, needle up/down, reverse & tie-off, automatic thread cutter, thread tension dial, built-in needle threader, free arm, thread knife, drop feed (feed teeth lever). |
| Buttonholes | One-Step Buttonhole (multiple styles supported; button-sized). |
| Bobbin System | Top drop-in; uses SINGER® Class 15 transparent bobbins (4 included; one pre-installed). |
| Recommended Needles | System 130/705H (various types for fabrics). |
| Foot Control | Type C-8000. |
| Power (Rated Voltage) | 240 V/50 Hz, 230 V/50 Hz, 220 V/50–60 Hz, 127 V/60 Hz, 125 V/60 Hz, 120 V/60 Hz, 100 V/50–60 Hz. |
| Dimensions (L × W × H) | Approx. 465 × 210 × 300 mm. |
| Weight | Approx. 6.3 kg. |
| Included Presser Feet | All-Purpose Foot (T; pre-attached), Satin Stitch Foot (A), One-Step Buttonhole Foot (D), Zipper Foot (I), Blind Hem Foot (F). |
| Included Accessories | Needles; foot control; power cord; 4× Class 15 transparent bobbins; felt pad; spool caps (large & small); auxiliary spool pin; brush & seam ripper; L-screwdriver; edge/quilting guide; removable accessory tray/free arm. (Extension table noted for other models in series.) |