My Kenmore 385 story (aka: how a “free” machine turned into my favorite shop buddy)
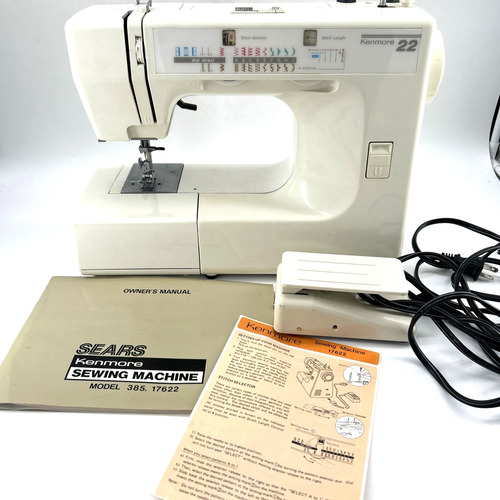
I still remember the text from my neighbor: “Do you want this old sewing machine before I donate it?” Ten minutes later I was on her porch hugging a gray hard cover like it was a treasure chest. Inside sat a Kenmore model 385 sewing machine — one of the Janome-made, mostly-metal ones with a side/vertical bobbin. I’d spent the previous week doom-scrolling r/myog threads about the Kenmore 385 and watching “Randy Your Sewing Machine Man” explain bobbins and tension like a calm shop teacher. Half of me expected a finicky relic. The other half hoped for a quiet workhorse.
First look, first grin
The body felt solid — heavier than the modern plastic boxes at the craft store, light enough to carry to the dining table. The foot pedal? A little hot. Everyone online warned me it’s sensitive, and they weren’t kidding. I plugged in, took a breath, and did the first ritual: new needle (90/14), fresh thread, and a quick dust-out under the plate.
Threading was straightforward — old-school mechanical paths with numbers stamped right where you need them. Winding the bobbin felt delightfully analog: thread through the little bobbin-winder tension disc, push the post over, pull the handwheel to disengage the clutch, and whoosh. The bobbin filled evenly, and for the first time in a long time I thought, “Oh…this is going to be fun.”
The “is it actually any good?” test
I didn’t start with a dainty pillowcase. I fed it VX21 X-Pac scraps. The Kenmore sewing machine 385 didn’t flinch — steady straight stitches, tidy tension. Next came DCF (just two layers) and some 1000D nylon webbing stacked on a seam. For those big lumps I followed another tip I’d read: slow down and hand-crank the hump. That little flywheel move made me feel like a machinist, and the stitches came out clean. Denim hem? Easy. Medium canvas? Same story.
It’s not an industrial, and I don’t pretend it is. I still respect it with sharp needles, the right thread, and a gentle pace over thick stacks. But as a daily driver for MYOG projects — stuff sacks, bike bags, simple packs — it’s exactly the partner I needed.
Tight spots, slow control
About that spicy pedal: the first hour felt like learning to drive a stick. I practiced on folded cotton until my foot found the micro-zone between “crawl” and “rocket.” Once my ankle learned the language, low-speed control was fine. In tight corners I sometimes tap the handwheel for a single stitch — old-school precision that digital buttons can’t beat.
What’s really inside (and why it matters)
Reading up on the 385 line taught me there are “eras.” Many older 385s are mechanical, cam-driven, with a vertical/front-loading bobbin and beefier parts — some even tagged with 1.0A motors. Later ones got lighter, with more stampings and a bit more plastic. Mine’s from the sturdier crowd, which explains the planted feel on the table and that smooth, rhythmic motor sound.
Marketing claims say “54 stitches,” but living with it taught me the honest truth: the magic here is the handful you actually use — straight, zigzag, a simple 4-step buttonhole, and a few stretch variations. Call it 14 real functions; call it enough. For making trail gear, those stitches cover 99% of the work.
First full project: a roll-top daypack
My test build was a VX21 roll-top with ECOPAK pockets and 1″ webbing anchors. I chalked lines, clipped in foam where needed, and popped on a cheap walking foot I keep around for slippery laminates. The kenmore 385 made beautiful, even seams, and when I hit a webbing-on-webbing cross, I slowed to a crawl and nudged the handwheel. No needle snap, no scary clunks — just a polite climb over the bump. I bar-tacked the strap anchors with a tight zigzag and reinforced the hip belt wings. When I unrolled it at the end, it looked store-bought on the outside and rock-solid on the inside.
Little quirks I learned to love
- Sensitive pedal: Practice pays off. Now I can stitch one perforation at a time if I want.
- Side-loading bobbin: It’s not “hard,” just different. Seat it the right direction, click, and you’re golden.
- Thick seams: Respect the machine — bigger needle, slow speed, handwheel over the tallest humps.
- Stitch menu: More than enough for gear making. Straight + zigzag do almost everything I need.
Maintenance = happiness
Every few projects I pop the plate, evict the fuzz, and add a tiny drop of oil where the manual suggests (yep, the 385 manuals are easy to find online). I keep a little pack of 80/12, 90/14, and 100/16 needles for when I switch fabrics. That’s it. The payback is a quiet, even stitch line that makes me look more skilled than I am.
Six months later
Since that porch pickup, I’ve sewn:
- ECOPAK frame sheet sleeves and hydration pockets
- VX21 seat packs with daisy chains
- Denim repairs that look brand new
- A DCF stuff sack that weighs basically nothing
The machine has never jammed in a dramatic way. When I mess up, it’s my threading or tension, not the motor or feed. And if I’m ever stumped, I rewatch a two-minute Randy video and feel smart again.
Why I’d choose it again (and again)
- Real-world power: Eats medium canvas, denim, VX21, and layered webbing when I respect the stack height.
- Mechanical honesty: Cam-driven, predictable, easy to diagnose and tune without a degree in electronics.
- Control at low speed: Once you learn the pedal (or use the handwheel in tight spots), it’s precise.
- Budget-friendly: These show up used for pocket change and sew better than most shiny plastic “new” machines.
- Perfect for MYOG: Straight + zigzag + reliable feed = everything I need to build trail-ready gear.
If you’re reading around trying to decide whether a Kenmore model 385 sewing machine is “enough,” take it from someone who went from curious to committed in one weekend: the Kenmore sewing machine 385 is a humble workhorse. It doesn’t scream with features; it just shows up, grips the fabric, and lays down straight, confident stitches. For me, it’s the sewing buddy that turned ideas into gear and calm into my workspace — and I can’t imagine my bench without this Kenmore 385 humming along at my heel.
Pros/cons of the Kenmore 385 based on the customers feedback:
| Pros | Cons |
|---|---|
| Handles X-Pac/VX21, heavier DCF, denim, and medium canvas when paired with the right needle and slow technique (hand-crank over thick humps). | Not an industrial: very thick stacks/webbing may require hand-cranking or may be beyond its comfort zone. |
| Mechanical, cam-driven design with a vertical (front/side-loading) bobbin — simple, predictable, and easy to maintain. | Foot pedal is often very sensitive; takes practice to get reliable low-speed control. |
| Many 385s were Janome-made (older units often Japan-made) and are praised as sturdy “little workhorses.” | Performance varies by sub-model: later/cheaper variants can be lighter with more plastic parts. |
| Older units commonly have 1.0A motors, giving good punch for everyday gear sewing. | Some units have 0.6A motors, which feel weaker on heavier materials. |
| Great for MYOG beginners: straightforward threading, clear paths, and easy everyday stitches. | Stitch selection is basic in real-world use; marketing counts can feel inflated versus the handful you’ll actually use. |
| Smooth, tidy stitches on outdoor fabrics; good value as a used machine (often inexpensive to acquire). | Side/vertical bobbin can be fiddly if inserted the wrong way; needs the correct bobbin style. |
| Stable feel on older/heavier versions; controllable with the handwheel for precision in tight spots. | Reports of inconsistent support/warranty on certain models as they age (manuals easy to find, but official service can be hit-or-miss). |
| Manuals are easy to find online; lots of community help and YouTube tutorials (e.g., threading, tension, bobbin winding). | Tension can be finicky on laminates like X-Pac until you dial in needle/thread/settings. |
| Affordable “daily driver” for repairs, packs, and stuff sacks — often outperforms modern budget plastic machines. | Some later models may omit features found on older ones (e.g., certain feed/disengage mechanisms), reducing versatility. |
| Good portability for classes or small spaces while still feeling more substantial than ultra-light modern machines. | Lighter/modernized versions can feel a bit less planted on the table than the older, heavier 385s. |
Kenmore 385 – Frequently Asked Questions
What is the kenmore model 385 sewing machine and what can it do?
It is a household zigzag machine with a center-needle, low-bar design made for straight, zigzag, stretch, decorative stitches and multiple buttonhole options. It also has a free arm, drop-feed lever, and a snap-on presser-foot system for quick change
What are the basic steps to wind a bobbin on the kenmore 385?
Pull out the clutch to disengage sewing, route thread through the bobbin-winder guide, thread the bobbin from inside to outside, push the spindle to the right, press the foot control to wind, trim the tail, then return the spindle left and push the clutch back in. The winder will stop when ful
How do I insert the bobbin in my kenmore sewing machine 385?
Place the bobbin so it unwinds counter-clockwise, pull the thread into the tension slot and around to the back, leave about 6 inches of tail, and close the hook cover plat
What is the correct top-thread path on the kenmore 385?
Raise the take-up lever and presser foot, place the spool so thread feeds from the back, draw thread into the guides and tension area around the check spring, go up through the take-up lever right-to-left, down through guides, then thread the needle front-to-bac
How do I bring up the bobbin thread on the kenmore 385?
Hold the needle thread, turn the handwheel one full turn toward you, pull the needle thread to bring up the bobbin loop, then pull both threads under the presser foot and to the back about 4–6 inche
What are good tension guidelines for straight and zigzag stitches?
For straight stitch, aim to lock threads between fabric layers; higher numbers tighten the top tension. For zigzag, bobbin thread should not show on top and top thread should show slightly on the underside—adjust top tension until it looks like tha
How should I set the presser-foot pressure on the kenmore 385?
Use 3 for most sewing, 2 for applique or cut-outs, 1 for very light or stretchy fabrics like chiffon or knits, and 0 for manual darning/embroidery. After specialty work, return it to 3 so you are ready for everyday sewin
How can I switch between flat-bed and free-arm sewing?
Pull the extension table straight off to expose the free arm for sleeves, cuffs, pant legs, bar tacks and tight circular areas. To go back to flat-bed mode, fit the tab into the slot and snap the table back o
What is the drop-feed lever for and when do I use it?
Use the drop-feed lever to lower the feed dogs for free-motion embroidery, darning, and sewing on buttons. After you finish, raise the feed dogs again for normal stitchin
What are the common feet for the kenmore 385 and their uses?
Typical set includes: Zigzag foot (general straight/zigzag, bar tacks, buttons, overcasting, blind hems), Straight foot (center-needle straight stitch), Sliding buttonhole foot (built-in buttonholes), Zipper foot, and Satin stitch foot. Feet snap on/off via the foot holde
Does the kenmore 385 have built-in buttonholes and templates?
Yes. You can sew rectangular buttonholes with the built-in system using the sliding foot—adjust density within the blue range for your fabric—and you can also use the snap-in buttonhole attachment with templates for round-end and keyhole styles. Practice on scraps and use interfacin
Is twin-needle sewing supported on the kenmore 385?
Yes. Thread both needles front-to-back and do not exceed the twin-needle width mark shown on the machine. Twin needle is an optional accessor
Any tips for using the foot control on the kenmore 385?
The foot control is sensitive and responds immediately. Press gently with the ball of your foot to speed up and ease off to slow down—practice on scraps to find your comfort zon
Can I raise the presser foot extra high for thick fabrics?
Yes. The presser-foot lever lifts about a quarter inch higher than normal to help position bulky items under the foo
What routine care does the kenmore 385 need?
Replace the light bulb with the same 15-watt type when needed, clean the bobbin holder, hook race and feed dogs regularly, and add a drop of good sewing-machine oil only at the points shown—no other oiling is require
How do I troubleshoot issues like loops, bunching, or skipped stitches?
Most issues trace to needle size/condition, threading, tension, presser-foot position, an uneven bobbin, lint in the hook area, or starting too fast. Rethread both paths, match needle and thread to fabric, reset tension, clean the hook race, and guide the fabric without pullin
What warranty does the manual list for the kenmore 385?
The manual describes a full 25-year warranty on the machine head, two years on electrical parts, and 90 days on parts and adjustments; actual coverage depends on purchase date and retaile
Will a kenmore 385 sew denim, canvas, X-Pac, DCF, or ECOPAK?
Based on customer feedback above, many owners successfully sew denim, medium canvas, and pack fabrics like VX21 and heavier DCF on the kenmore 385. Use a sharp 90/14 or 100/16 needle, suitable thread, proper pressure setting, go slow at thick seams, and hand-crank the wheel over big humps if needed. Also note that the pedal is quite sensitive at low speeds—practice helps.
| Specification | Details |
|---|---|
| Model | Kenmore 385.17526 zigzag sewing machine |
| Machine type | Center-needle, low-bar; designed for household use |
| Power | 110–120V AC outlet; polarized plug; power switch also controls the sewing light |
| Light | Built-in sewing light; replace bulb with same type rated 15W |
| Foot control | Models YC-482P or YC-530; variable speed with sensitive response for immediate increase/decrease |
| Stitch selection | Mechanical selector with color-coded zones: Red (utility), Green (geometric decorative), Blue (buttonhole), Yellow (stretch) |
| Stitch width control | Adjustable stitch width; twin-needle has a marked maximum; buttonhole width adjustable in the blue zone |
| Stitch length control | Variable; “stretch” position selects the lower row of stitches (stretch patterns) |
| Buttonholes | Built-in buttonhole system (use Sliding Buttonhole Foot) and compatibility with separate Buttonhole Attachment & templates |
| Free arm | Removable extension table enables free-arm sewing for sleeves, waistbands, pant legs, etc. |
| Feed dogs | Drop Feed lever lets you lower feed dogs for embroidery, darning, and sewing on buttons |
| Presser foot pressure | Dial inside face cover: 3 (most sewing), 2 (appliqué/cut-out), 1 (basting & very light fabrics, velours/knits), 0 (manual darning/embroidery) |
| Presser foot lift | Extra-high lift about 1/4″ above normal up position for bulky fabrics or foot changes |
| Thread cutter | Integrated side thread cutter for trimming after sewing |
| Bobbin winding | Top bobbin-winding spindle; push-pull clutch used to disengage needle while winding |
| Accessories (typical) | Straight, Zigzag, Zipper, Satin-stitch, Sliding Buttonhole feet; needle set; bobbins; spool holders; screwdrivers; lint brush; additional spool pin; buttonhole attachment & templates (availability may vary by set) |
| Twin-needle capability | Supported; observe the twin-needle width mark; twin needle is an optional accessory |